A blog about traveling, vandwelling, and life on the road. Check out van life reviews, tips, videos and more!
Sunday, October 18, 2015
My Conversion: Kitchen
Well, except for some minor tweaks, the kitchen cabinets are in and done. Its not how i plannned but im running out of time. The mountains here are already hitting freezing temps and snow will be coming. I relocated the electrical over there too.
I used pocket screws and 2 sheets of cheap plywood, breadboard finish on top and lacquer elsewhere. And way too much time. I might add paint, and more doors later. Cost was 60-70 bucks. Beats a walmart particle board anyday.
Moving on to the roof rack, then the closets. A tuneup if i can find someone to do it same day and im outta here.
Labels:
campervan,
campervan conversion,
cheap,
conversion,
daily life,
My conversion,
simplify,
travel,
van,
van dwelling,
vandwelling
Wednesday, October 7, 2015
My Conversion: Rock n Roll Style Bed Frame
If you subscribe to cheaprvliving as well, sorry if there is repeated posts here
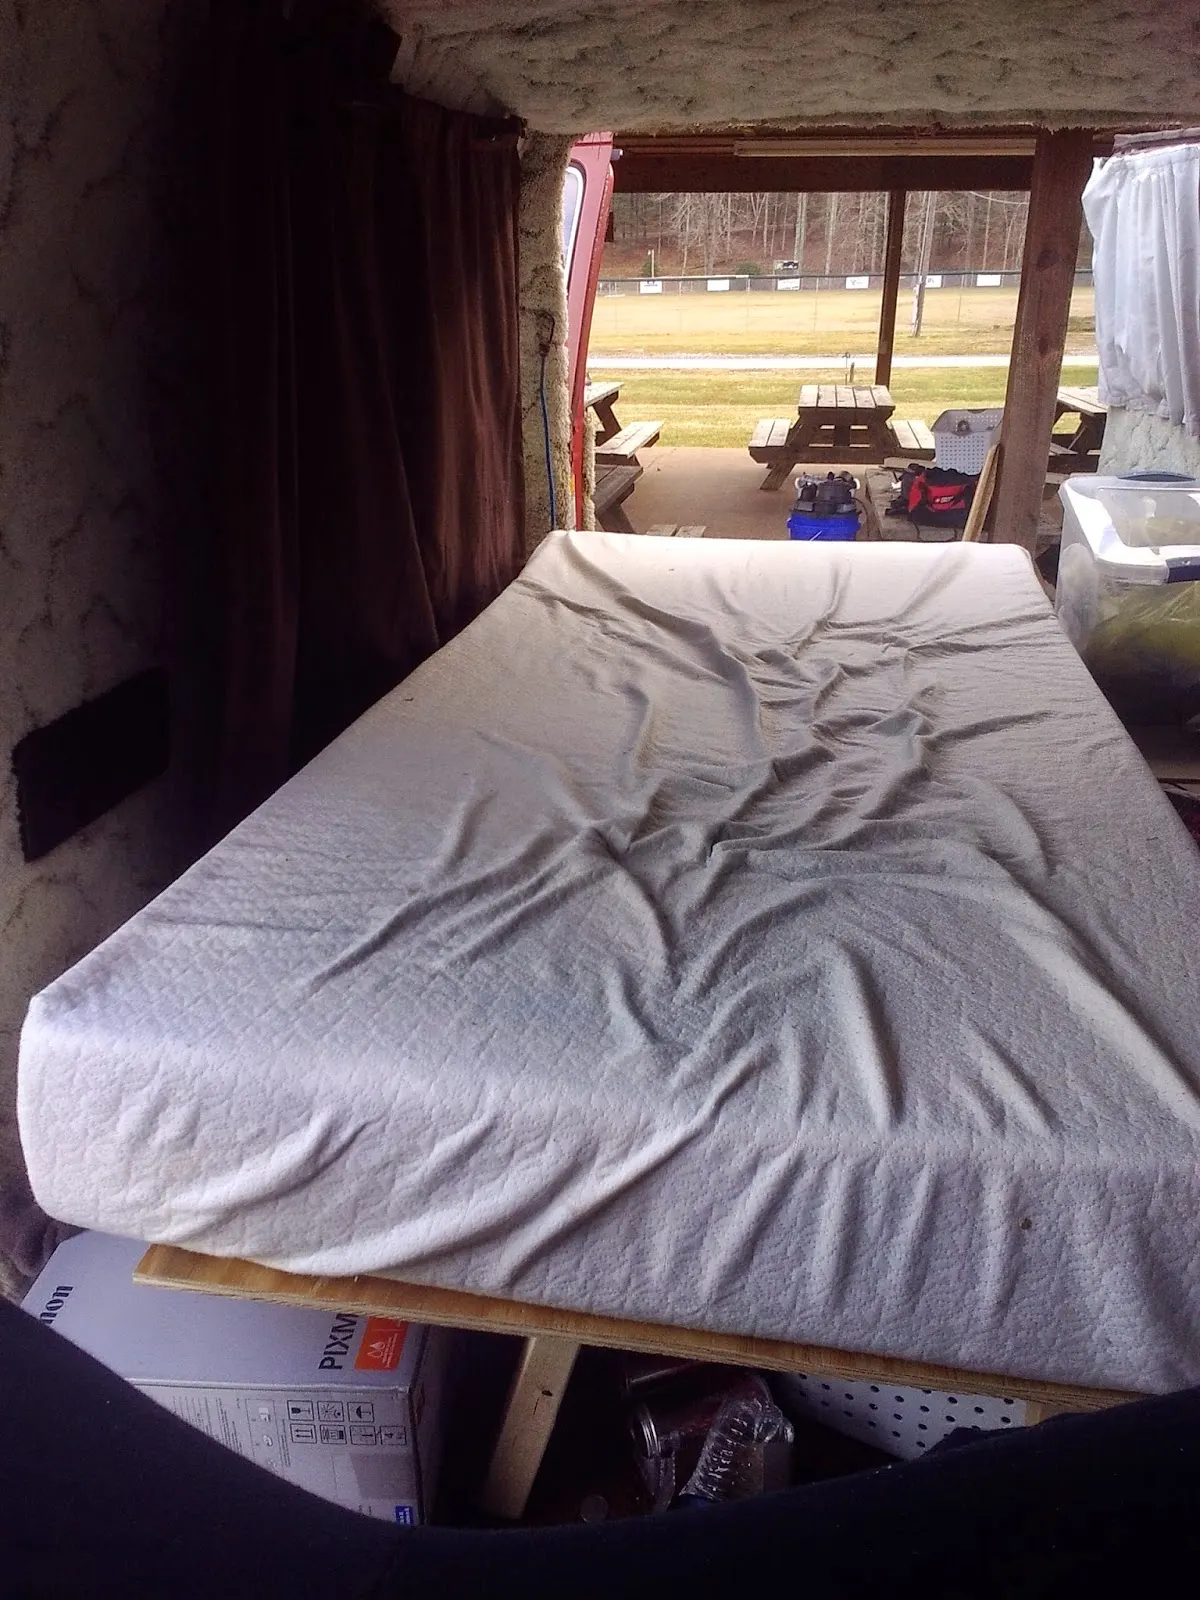
down position:
![[Image: a4642f9f7bfd94402e8193a377d797f8.jpg]](/15/10/04/a4642f9f7bfd94402e8193a377d797f8.webp)
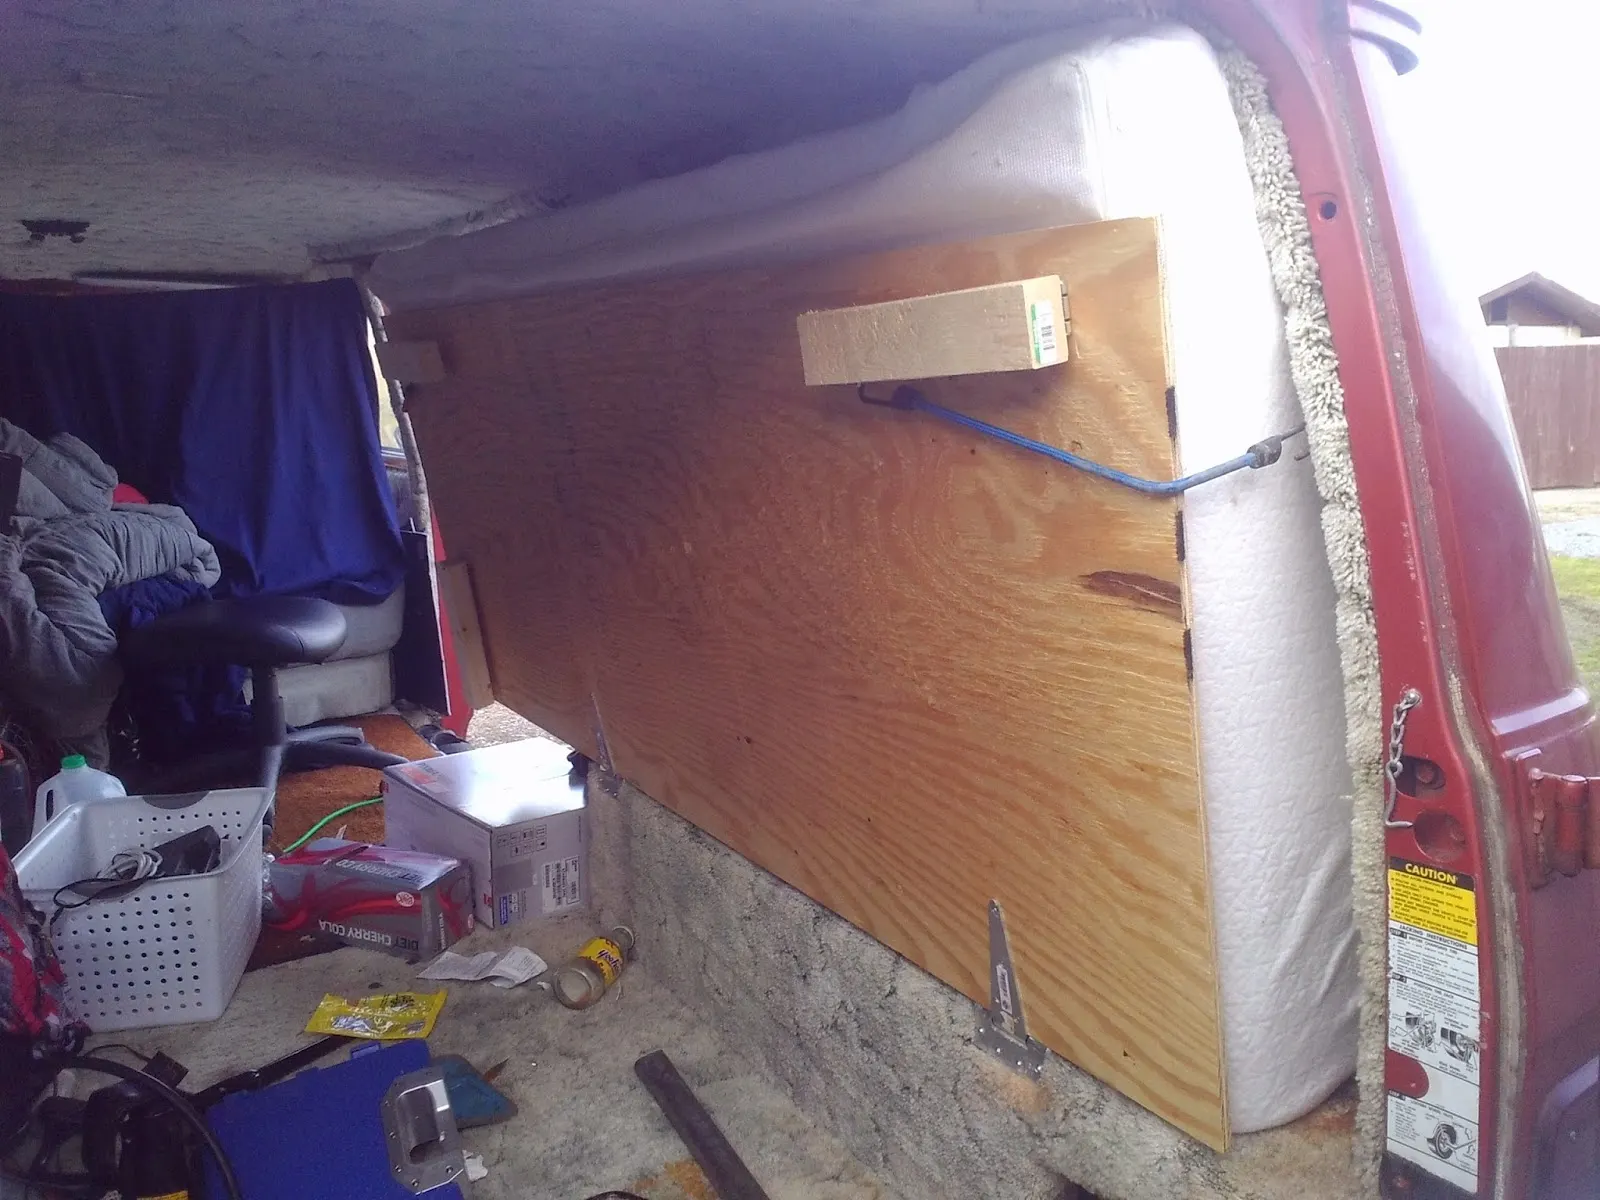
up (mostly, stuffs in way):
![[Image: 883d1f4289360700c315db34b613960f.jpg]](/15/10/04/883d1f4289360700c315db34b613960f.webp)
rear door view:
![[Image: 62f19178706b609e2b0b59a25b3030e8.jpg]](/15/10/04/62f19178706b609e2b0b59a25b3030e8.webp)
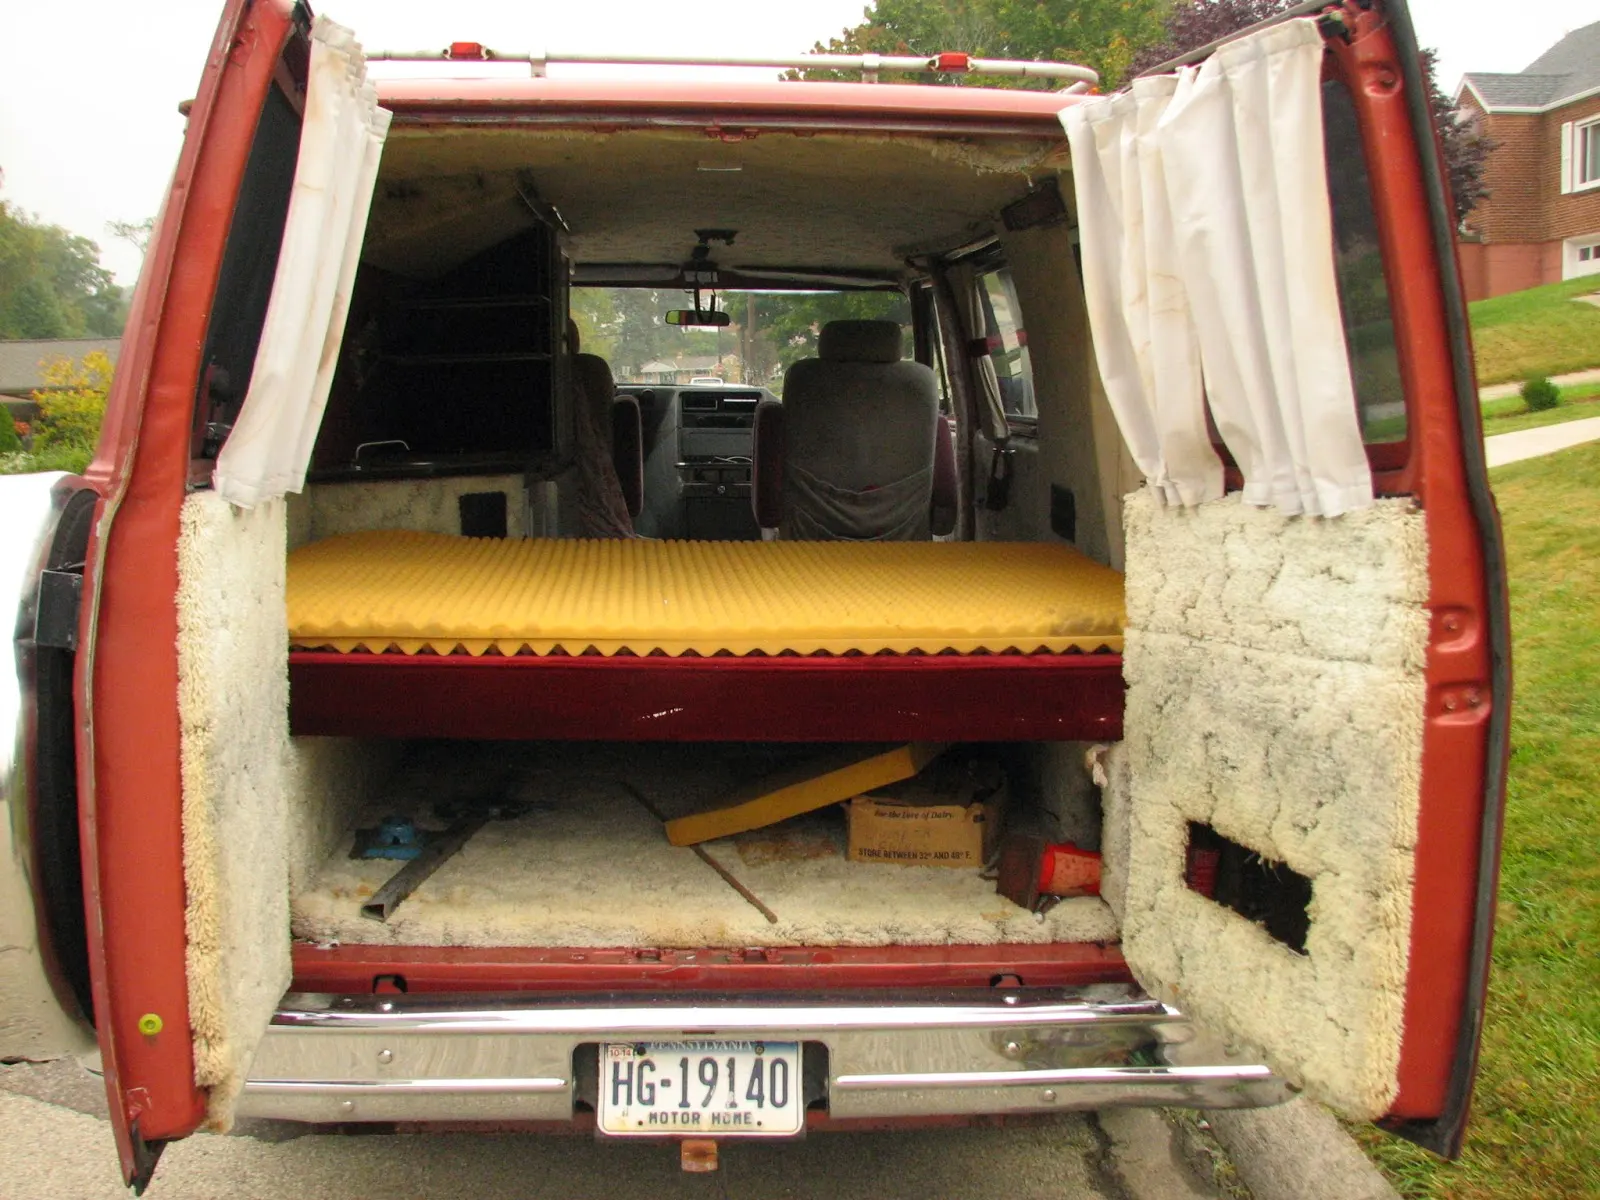
This bed frame was a bit of a learning experience for me, I think it can be done better/lighter and with more storage room, but Im not hatin it. I need to upholster my mattress, so until then im in bed mode only. Which is fine for now. The choice of OSB might turn some people off, but its the thickest board you can get for 13 bucks (5 bucks if you get the top piece from stack) and my last bed used it on top as well for 2 years with no problems.
Im working on the galley now, and trying out my pocket screw jig, which seems pretty nifty. I went a little trigger happy with it though and added pocket holes i didn't need to at one point but oh well, no one will see em lol
I have also added 2 ladder racks (the kind with just the poles spanning the van) to the roof and painting treated lumber to go up there for a rack/platform, for my panels and maybe some storage. I decided that painting sucks :\ But its a lot cheaper than buying a metal rack, and this way i can customize it.
Update: This bed has been retired. I think the bed if made like this isnt feasible, as it is too heavy to fold and unfold easily. Also it is so limiting with storage space underneath, the trade off for sitting space when in seat form is not worth it. I think it can be viable with some weight saving materials and design tweaks however.
down position:
![[Image: a4642f9f7bfd94402e8193a377d797f8.jpg]](/15/10/04/a4642f9f7bfd94402e8193a377d797f8.webp)
up (mostly, stuffs in way):
![[Image: 883d1f4289360700c315db34b613960f.jpg]](/15/10/04/883d1f4289360700c315db34b613960f.webp)
rear door view:
![[Image: 62f19178706b609e2b0b59a25b3030e8.jpg]](/15/10/04/62f19178706b609e2b0b59a25b3030e8.webp)
This bed frame was a bit of a learning experience for me, I think it can be done better/lighter and with more storage room, but Im not hatin it. I need to upholster my mattress, so until then im in bed mode only. Which is fine for now. The choice of OSB might turn some people off, but its the thickest board you can get for 13 bucks (5 bucks if you get the top piece from stack) and my last bed used it on top as well for 2 years with no problems.
Im working on the galley now, and trying out my pocket screw jig, which seems pretty nifty. I went a little trigger happy with it though and added pocket holes i didn't need to at one point but oh well, no one will see em lol
I have also added 2 ladder racks (the kind with just the poles spanning the van) to the roof and painting treated lumber to go up there for a rack/platform, for my panels and maybe some storage. I decided that painting sucks :\ But its a lot cheaper than buying a metal rack, and this way i can customize it.
Update: This bed has been retired. I think the bed if made like this isnt feasible, as it is too heavy to fold and unfold easily. Also it is so limiting with storage space underneath, the trade off for sitting space when in seat form is not worth it. I think it can be viable with some weight saving materials and design tweaks however.
Labels:
bed,
camper van,
campervan conversion,
Chevy G10,
conversion,
DIY,
DIY bed,
My conversion,
rock and roll bed,
van,
van dwelling,
vandwelling
Tuesday, September 29, 2015
The $320 1 Hour Van Conversion
![]() |
| Storage might also go to the right here instead of stool. |
After the interest in my $800 1 Week No Skill Van Conversion, I got me thinking that there are more people out there who might be looking for an even faster, and less expensive, van conversion to get them on the road. Most people like to get started, and then upgrade their space as they find out more about what things work best for them. On forums, I see people burning a lot of time and money, or constantly struggling to save up the knot of cash for their dream conversion, only to find out they need to scrap it later as they figure out what they actually need.
So why bother? You can spend a very small amount of money and get out on the road or more importantly, out from under your house bills. Ill show you how to do it in less than a single hour (delivery times not withstanding, though with amazon prime it would only take 2 days) and less than a paycheck.
To be happy in this life style (and not quitting because you are miserable), at the very least you need a comfortable bed, a way to cook, a way to go potty, some light, and organization. Ill break down each of these.
As with the previous No Skill Conversion, you won't need any tools or prior knowledge. Ill try to keep prices current and the cheapest option listed, so check back for updates if you have to. I've tested all these items for min. 2 weeks (often longer), or a very similar item (since i may update with a better/cheaper alternative).
If you would like to see a video of this conversion instead, stay tuned! (or better yet, subscribe to my youtube channel and get notified when it drops! :))
Sleep
![]() |
| Don't mind the hole in the wall... |
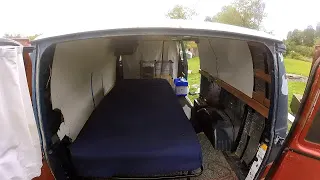
The best mattress I have found for the money is the Signature Sleep 8-Inch Memory Foam Mattress, Twin from Amazon. I've used this mattress for 2 years now, and it has held up exceptionally well. I am a very large man, and I still don't bottom out on it.
![]() |
| So easy! |
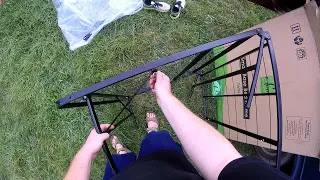
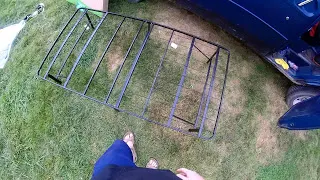
For the frame I selected the Sleep Master SmartBase Mattress Bed Frame from walmart. It is available from amazon if you need it delivered but its about 40 dollars cheaper through walmart. This bedframe is very light and assembles in about 2 minutes, you have to tighten 4 wing nuts with your fingers and you are done.
![]() |
| I ordered and used this for 2 weeks, just for you! |
I was shocked at just how simple it was, and it has worked very well in my 2 week test. Some reviewers complained of noise, but I have not noticed an abundance, certainly not as much as some box springs I have owned.
![]() |
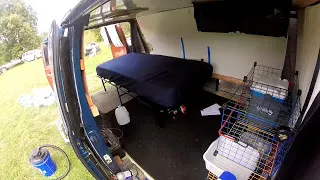
| Still some room under and beside the bed. |
Cooking
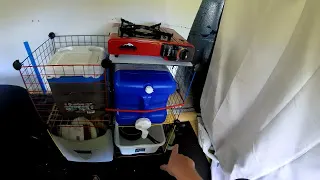
I've had this idea for a kitchen galley for a long time. Kitchen cabinets/counters can be very expensive, and very difficult to build yourself if you don't have the tools or know-how. I solved this problem with Whitmor 6256-978 Storage Cubes. These little metal wire storage cubes are pretty neat, they use plastic connectors to assemble (just squeeze them on) and so you can customize the configuration to what you like. I chose the 4 cube set (kids set is same as regular, but cheaper, its just multicolored). Each cube is 15 inches.
Update: If you can get milk crates free or cheaper, they can be used the same way, zip tied together.
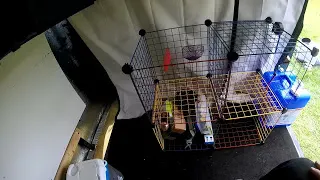
![]() |
| Assembled, and ready, takes minutes and elbow grease. |
You can leave the front side of a cube open for front access, or the top off to reach down in. The wire structure is very handy in general, you can clip bungees, caribiners, and items right to it. You can also make it even more secure with zip ties at the connections.
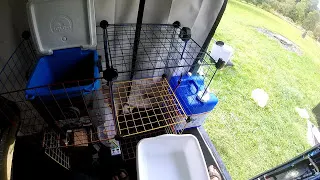
![]() |
| Its not a fridge but it will work... |
The left cube I left the top off, to drop a Small Cooler inside. This allows me to open it from the top easily. The right cube has a top but the front face is left off, and an Reliance Products Aqua-Tainer 7 Gallon Rigid Water Container slides inside for our faucet. Secure it with a bungee. Ive driven this down ridiculously rough roads to test it, and despite the weight (and a slight bow to the cube bottom) it holds up fine even without zip ties, but if filling it i would use them. This video explains further.
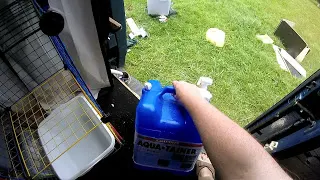
![]() |
| Don't fill all the way if you can help it, heavy! |
The sink is a simple dish pan from the local dollar store, not gonna bother linking it, just slide it in the cube beneath :) Pull the pan out under the faucet to catch water, remove the pan completely to toss grey water out. This is a good place to store dishes and frying pan/pot too. I also store some personal hygiene stuff here too, so its a bathroom sink and kitchen sink.
The last cube you can leave the front off and stick food inside, or if you want to spend an extra 6 dollars get a cloth cube drawer as pictured here.
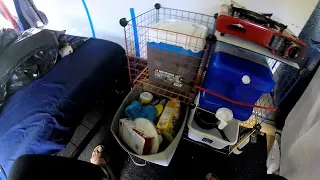
![]() |
| Surprising amount of food in there |
Although you can do most of your cooking over the campfire, some times you might be restricted from doing so. For a stove I chose the smallest and cheapest type, a butane stove. They are pretty much all very similar, so this Butane Stove is fine.
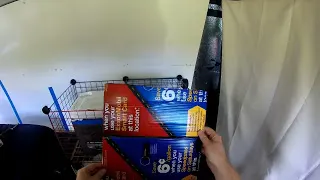
![]() |
| Free! Cut to fit. |
Since these have little feet on em, I decided to cover the top right cube with corrugated plastic, which conveniently slots into the cubes plastic connectors. You can get this plastic for free, gas station signs (ask first!) and tons of election signs (after election) are made from them, just cut them and use the white side.
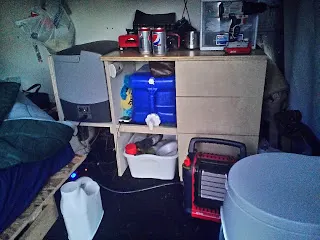
I tested cooking inside with this setup. A word of caution, as with any flame you need to have ventilation and adequate space around and above it. I have a roof vent that works, but since the stove is far from it and my van has a low ceiling, I have to keep an eye on it. I left the stove running for a while with nothing on it, and the paneling above was too hot to touch after about 10 minutes. So better to move the stove where it has ample room above it (floor or outside) or limit cooking times to a short duration. You might notice the fire extinguisher, I also have a carbon monoxide detector, and a wool fire blanket.
I strap the stove to the cube top with another bungee for transport.
Moving the stove also provides a small counter, or just use the top of the cooler :)
Organization
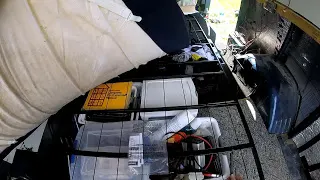
![]() |
| Little drawers, 3 small baskets, clothes, and still more space. |
Under the bed is plenty of room for storage. It may be a little tough to get to, as you dont have much room left beside the bed frame to pull stuff out. I used several small containers I had on hand already and stuck them under in various ways, it worked out well. I think for clothing storage, Whitmor Jumbo Underbed Bags Zippered Java will work good. Each one should fit between the legs, and can be partially pulled out to get access. Of course with the bedframe, you can lift the bed up and reach through the frame too, one of the benefits of not having to have a box spring.
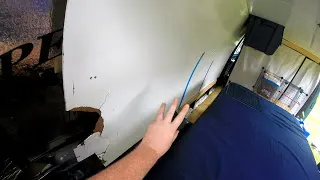
![]() |
| Lots of storage back here, over/around the wheel well. |
For the other organization aspects, just work in baskets and smaller containers where needed. If you can squeeze it in there, a 3 drawer unit from wally world might work (in this setup, id put it against the curtain up front behind passenger seat where i originally had the cubes if i didnt want a chair/stool). Since the bed frame unfortunately does not fit over the wheel wells, you can still use that space behind the bed to great effect. Throw long storage items back there like duffel bag for dirty clothes, folding camp chair, tire change gear, tent etc.
Potty/Bath

![]() |
| Not much to say... |
Light
Easy to overlook, but it just takes one night to realize you need it. I keep a ton of cheap led flashlights on hand (check the tractor supply store bargain bin), but tap lights are a great way to have more 'permanent' house lighting. The Fulcrum 30010-301 LED Battery-Operated Stick-On Tap Light, Silver, 3 Pack, should do fine, stick one near the front, on the ceiling above the bed right in the middle of van, and one a back door.Thats it!
This should come out to right around 320 dollars, maybe a littlemore r less depending on when you read this. Some carpet from walmart ($20) and privacy curtains ($12) could tie it together. Of course you can add on or modify this forever by spending a little more (on electrical system for instance...) or even a little less (a good air mattress might save some cash....), but I hope that this conversion will provide a fast, inexpensive base to build your van dwelling life on.
Got a better idea for a really inexpensive van conversion? Let me know in the comments. Any questions as well. Thanks for reading! Next up....my real van conversion build out ;)
PS: I think another good alternative to the cube galley is a desk (which i mention in the other conversion), which can serve its intended function and the role of kitchen counter and food storage. However, it costs a little more for a walmart or ikea desk, which is junk in the long run (painted particle board). I speak from experience, after a while it falls apart. A nicer built desk would work good, but cost ya.
PPS: Also, if your in cold weather, and unable to move with the seasons, a Mr Buddy heater and insulation are a must.
Labels:
$320,
budget,
budgeting,
camper,
camper van,
campervan,
campervan conversion,
cheap,
conversion,
cooking,
RV,
simplify,
tiny house,
van,
van dwelling,
vandwelling
Monday, September 7, 2015
Holding Pattern
![]() |
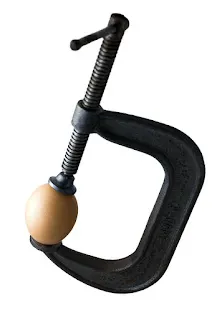
| Egg In Clamp, courtesy of freepik |
But he has not so far, and there isn't much I can do about it. I don't know if this is some sort of payback for leaving or what, but as my small amount of funds dwindles I may have to go right back to work again and all my plans will be changed. This is pretty depressing for me.
I looked up my options from a legal standpoint, and for some reason the gov decided that for 'administrative purposes' they can drag this out to February, minimum, if they want to do so. Its my money, which is dwindling every day it sits there as the market drops. All i can do is hope they will do the decent thing and submit my paper work.
I guess if there is a silver lining, I am getting the opportunity to really see how far i can stretch my dollar this way.
Sunday, August 9, 2015
11 days till freedom
The time is getting close. Though I will probably spend a little more time getting my affairs together and doing some work on the van, the 20th is the day i leave my job of ten years. I am both nervous and excited. Im off this weekend and I'm visiting the family and getting some videos done, including my kayak video. Which has roosters screaming in the background.
I have a lot of respect now for those who make youtube videos, it takes a lot of work and a lot of time rendering even a smaller video. I'm disabling adblock on youtube in the future. lol
I have plans to revisit my 'easy van conversion', and do a video of my actually installing a version of it in my van, since it is pretty much empty awaiting me to (re)convert it into a home. So look forward to that probably around the beginning of next month.
I have a lot of respect now for those who make youtube videos, it takes a lot of work and a lot of time rendering even a smaller video. I'm disabling adblock on youtube in the future. lol
I have plans to revisit my 'easy van conversion', and do a video of my actually installing a version of it in my van, since it is pretty much empty awaiting me to (re)convert it into a home. So look forward to that probably around the beginning of next month.
Labels:
adventures,
budget,
conversion,
traveling,
van dwelling,
vandwelling,
youtube
Sunday, August 2, 2015
Van Life Hack: Keep Dry!
I decided to do a youtube series of little tips and tricks or "life hacks" that apply to people who live in a van or other tiny spaces. This first van life hack tells you how I avoid mildew spells in the van while still having fun in the water.
Enjoy, and be sure to subscribe while you are there, I have a lot more vids coming!
Labels:
budget,
cheap camper,
simplify,
tiny house,
travel,
vagabond,
van,
van life hacks,
vandwelling,
youtube
Saturday, August 1, 2015
Review: Grapesolar Glacier 1.1cu Fridge (GS-CF-1.1-FAB1)
![]() | ||||
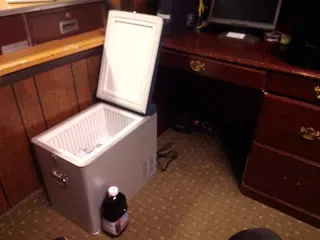
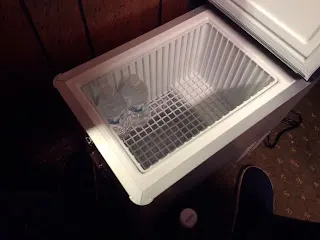
| View of the Glacier 1.1 cu/ft fridge, juice bottle added for scale |
Upon discovery of this unit, I did what any good vandweller would do, I immediately looked for reviews. Unfortunately, they were few and far between, with literally less than 5 that i could find between various stores and amazon. Even the mighty youtube failed me, only turning up product promos from retailers.
![]() | |
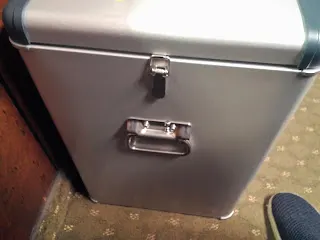
| The handle is extremely rugged, the latch not so much. It seals tight though. |
The fridge arrived well packaged, with no notable damage or issues. The unit comes with both the cigarette style DC cord (never plug this into the actual car lighter, however) and an AC house plug/option as well. Also included were a rather sparse but effective manual and not much else.
![]() |
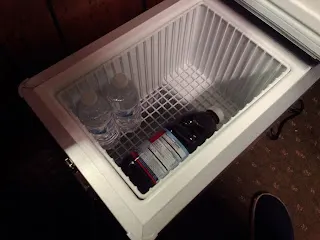
| Upper Compartment of the Glacier fridge,lots of room. |
![]() |
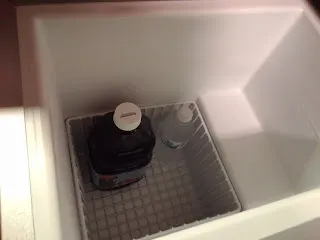
| The lower compartment for colder items, tall items too if you remove basket |
![]() | ||
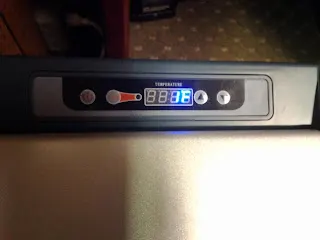
| Digital temperature display, power and setting buttons |
So how did it run in the van? Well, unfortunately I wouldn't be able to find out right away. My house batteries were about 2 years old, and in my naivety I damaged them pretty well. I thought they still should have enough power to supply the fridge, and I believe they could run it, if not for one of the first quirks of the fridge that I discovered.
WARNING: Technobabble Incoming!
![]() |
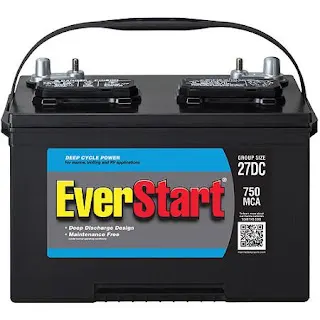
| Not the best out there, but its 90AH and will do the job for cheap. |
![]() |
| Filling the fridge with low risk test food. |
It was a hot the following day. As the day went on and temperatures steadily rose to 90, things began to go wrong. I looked to find the fridge was clear into the 50s. For a compressor run fridge, this was totally unacceptable. I checked the battery state, but it was well charged due to the sun.
The fridge just wasn't seeming to run enough to reach the temperature it was set at. I noticed the fridge had a 'turbo button', never explained, so I engaged that. After a while, the temperature began to drop as the compressor kicked on to bring it down near my requested setting. I am not sure what the purpose of the turbo button is, but shouldn't the fridge do this all the time anyway?
![]() |
| Fridge in hot van, struggling to get down to temperature. |
And so it went throughout the day, I would adjust it down far below my desired temp, it would drop some, and though it wouldn't skyrocket to 50+ like before, it seemed to really struggle to maintain temperature. I can understand a few degrees, I am pretty sure all fridges do this, but this was 7-10 degree differences, which could result in food spoilage.
Conclusion:
Though I believe you can get the job done with this fridge, at quite a bit of savings, it will require too much tending for my tastes. In an environment like a van, and with me leaving it unattended regularly, that's a risk I can't justify. Couple that with its very demanding low voltage cut off issues (what if my battery degrades over time, as they inevitably do?), I decided to return the Glacier.
UPDATE 8/19/15: I do believe part of the problems i encountered here could be solved by running solid wire (no butt connections) straight from battery to plug/fridge. I ran my 12v receptacle through my fuse box, and it has thinner wire that came with it, that I butted in line with the thicker wire I used. I discovered this after installing another fridge.
Thanks for reading, and be sure to check out my youtube review video as well where I discuss some of these issues and give you an in action view of the fridge.
Labels:
batteries,
battery,
budget,
cheap camper,
cooking,
money,
refrigerator,
research,
review,
simplify,
thermostat,
tiny house,
travel,
van dwelling,
vandwelling,
voltage,
youtube
Wednesday, June 24, 2015
Big Changes
Ive decided that after 10 years of being at the same job and 2 years of vandwelling in one place, I am going to throw caution to the wind, and start heading down the road this winter. The thought of another year of mountain snow and looking at the same four walls has convinced me. I'm not sure if the van will live very long on a trip or not, but i should have enough emergency fund to either continue with something else, or return back home.
Ive renamed the blog in honor of this change. Its a little bit of a joke, as a few people have mentioned that this is a weird way to have a mid-life crisis. Thats ok, cause I embrace the idea! Since I am not even 40 yet, i cant rightly call it a mid-life crisis, so van-life crisis sounds about right. I think the only real crisis is that I waited this long to hit the road.
“A bend in the road is not the end of the road…Unless you fail to make the turn.”
―Helen Keller
So eventually this blog will morph into a bit of a travel blog as well. I have a couple projects in the works and some reviews coming up as well, so look forward to it. See ya out there.
Sunday, May 24, 2015
Poured a little more into the pit.
Even tho i want to move on from the van, i couldnt keep driving it in its current state safely. so i boke down and ponied up for new tires, and ordered some shocks. ill probably never get that money back out of it, but at least i wont feel like a hazard to myself and others going down the highway.
Friday, March 27, 2015
Changes on the horizon?
![]() |
| Maybe too ambitious? |
Well I think I am ready for a change from the G10. I ran into an electrical problem, which I eventually fixed with a new battery. But its become evident to me that it wont be the last thing, and I am pouring money into a sinking ship, patching holes as more spawn. Even if nothing major is wrong, I am constantly worrying and wondering when something will leave me stuck somewhere, maybe in traffic.
I broke down and went to a dealership. I really hate the idea of financing something, pinning me down for years, but its not so hard to digest when i think of it like buying a home. But despite claims on the radio to the contrary, they didn't have what i really wanted in stock and even when I was willing to compromise, they wouldn't give me a loan without a cosign. I don't have bad credit, indeed I have no credit at all. The report comes back blank. Their ads love to tote how they will lend to anyone....but i guess they will lend to anyone who has family or very trusting friends with good credit. I do not.
So now I am socking away the money i would have made on a payment, and I am hunting for a pickup truck. I decided I wanted to build my own truck camper, so when I do get out on the road I can go anywhere. I also like the idea of total customization, a van is an open canvas, but this time I will be making the canvas too.
Now to just find one I can afford, while avoiding dumping cash into the van in the mean time.
Sunday, February 8, 2015
Best 3 dollars I ever spent!
Today i am sitting at my sisters, about to sleep before a busy day moving into my g10. Had no idea how to get the broke van here ..then called my roadside assistance thru my insurance, added for 3 bucks when i got the g20. i was nervous but they made the process great and towed 50 miles and dropped me and my van 5 feet from my other one, 11pm at night. I highly recommend this cheap option if you can!
One thing to watch out for is shady tow truck drivers, the first tow truck driver they called tried to say I was only covered for $50 (but I was actually covered for a hundred miles no mention of monetary amount) he was trying to say I would have to pay an additional $100 to get towed. I immediately called them back at the insurance company and they cancelled that guy and got a different guy out there to help me. I wasn't born yesterday.
I'm trying to keep a positive attitude about everything just go from here
Labels:
break down,
budget,
Chevy G20,
conversion,
van,
vandwelling
Thursday, February 5, 2015
Rough week, RIP van...
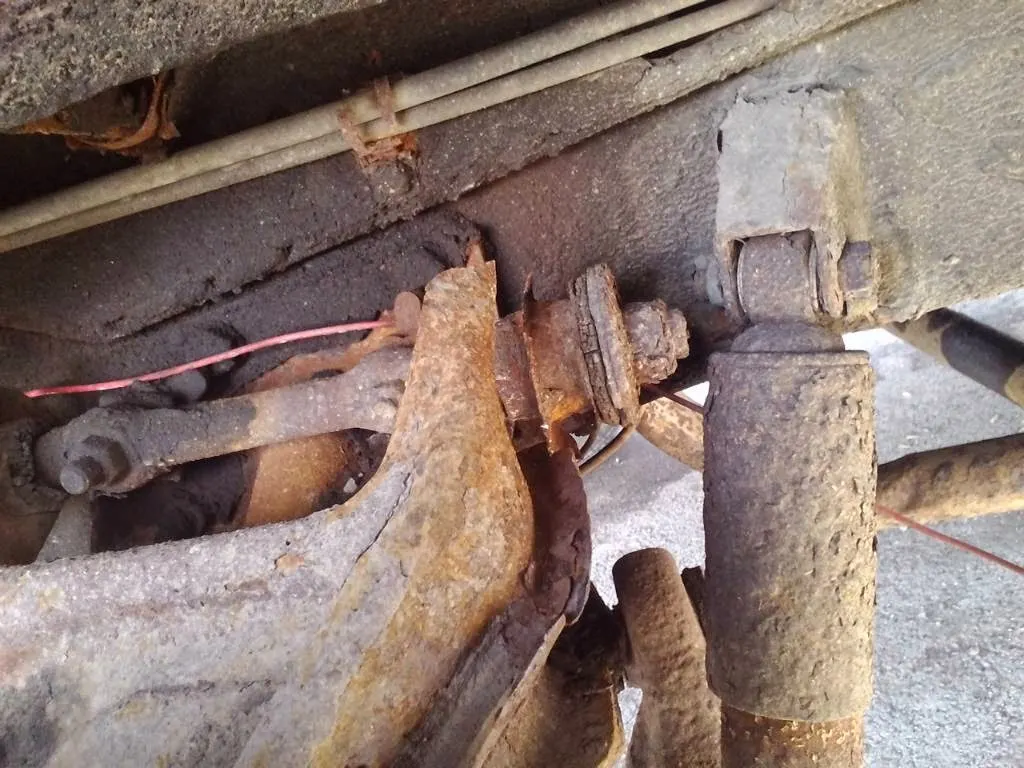
This week Ive been pretty sick, the temp has been freezing, and Ive had some front end problem with the van. Well turns out the control arm is broken, snapped like a rusty twig. Can it be repaired? probably. Will I be doing that? Nope. I am not going to pump more money into a sinking ship, so I am going to try to get back in my previous van, at least until I can save up for something newer.
Luckily I only paid 600 for the G20, plus repairs Ive already sunk in. Im going to try to transplant some body parts from it, and then recoup as much as I can from scrapping it. There is some complications regarding the registration, WV's stupid personal property tax scam etc, and the logistics of getting my van to where the other one is located. When it rains it pours.
So, here is to hoping things get better.
Labels:
break down,
budget,
Chevy G20,
maintenance,
van,
vandwelling
Friday, January 23, 2015
Measure twice? More like 20..
Looking at my plans for the van layout, after relocating the bed it's quite apparent that the van is thinner than I believed it was. It's not a huge deal especially since my bed folds up but I'll have to make some adjustments like my cabinets are probably going to be smaller. Not quite sure where I got the measurements from, I might have just taken them off line which could have meant they were from a different model van. Or maybe I'm just looking at different parts of the van because it's curved. I think given the nature of a van its just going to be easier to use cardboard templates than measuring.
Tuesday, January 20, 2015
Transformers, more than meets the eye!
![]() |
| bed is cut to 35 x 75 |
![]() |
| Mattress slides forward a little due to curve at back. |
Wanted to get pics up , it could use some more support in middle and i have an idea on how to replace bungees with something stronger, but I'm pretty satisfied!
I want to put a tall cabinet that is accessible from the driver side rear door for tools etc, and I am planning to put either a slide out or folding table/desk that goes across the passenger rear door side from the side of that cabinet, so when I put up the bed i can convert to a work space.
ply, $20
2x3, $3
hinges, $16
screws (100pk), $5
Bungees and Mattress were on hand.
Update: I don't feel, in the end, that the floor space gained by this was a good trade off for the under bed storage you lose by keeping that area of the floor open for use. Maybe if you had to haul sizable cargo for work or something.
Labels:
bed,
budget,
cheap camper,
Chevy G20,
conversion,
tiny house,
traveler,
vandwelling,
woodwork
G20 Conversion, fold away bed
So my current van is a 85 Chevy G20, pretty similar to my previous van but it has windows and was converted by someone else before I bought it. It had a bed across the back, over wheel well boxes he built. This would have been fine, and how I had my bed in the other van, but because the mattress is longer than the van is wide, it had to be squeezed in. The G20 has a window right where this happens though, and it caused the mattress to ooze into the window and skew it.
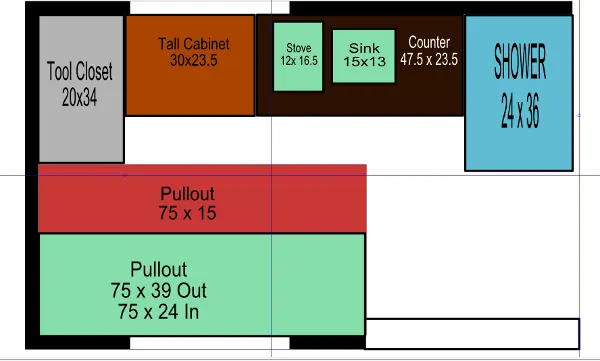
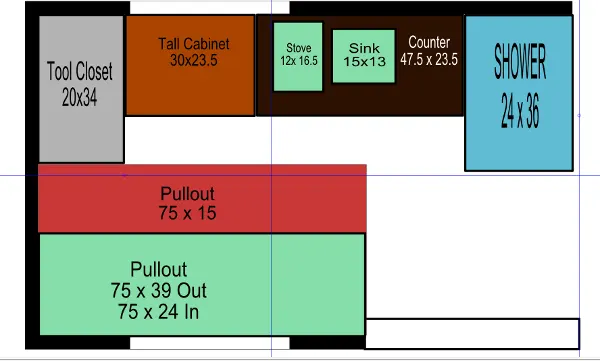
It drove me crazy. So I started thinking of ways to fix the bed, and I decided i wanted it to sit along the wall between the slider and the rear door, lengthwise. I need to have some storage on the other side, so the bed would be too wide for me to place my gigantic feet, so i wanted to do a pullout 'gaucho' style bed/sofa.
| Rough plan, there will be many modifications.. |
But then I had the idea of putting the bed completely away, and using the space as a work area/office.
So sat. i set up a frame so the bed will fold up against the wall when not in use. The frame is done and working, just need to cut the mattress down to fit the smaller space it has to go in. Those darn curved walls always get ya in the van. Ill post pictures once i finish getting it all fitted in.
Labels:
ambitions,
budget,
Chevy G20,
conversion,
van dwelling,
vandwelling,
woodwork
Tuesday, January 6, 2015
No Skill Conversion Upgrades
I decided to add an optional section to the 1 week No Skill Conversion. What I mean by the optional is items that will upgrade or enhance your living experience beyond the essentials. They may replace other items on the list that serve a similar purpose. They still will require little to no technical expertise beyond plugging things in or simple connectors etc.
They are NOT reflected in the conversions overall price estimate.
- ZODI Outback Gear Travel Shower (hot water)
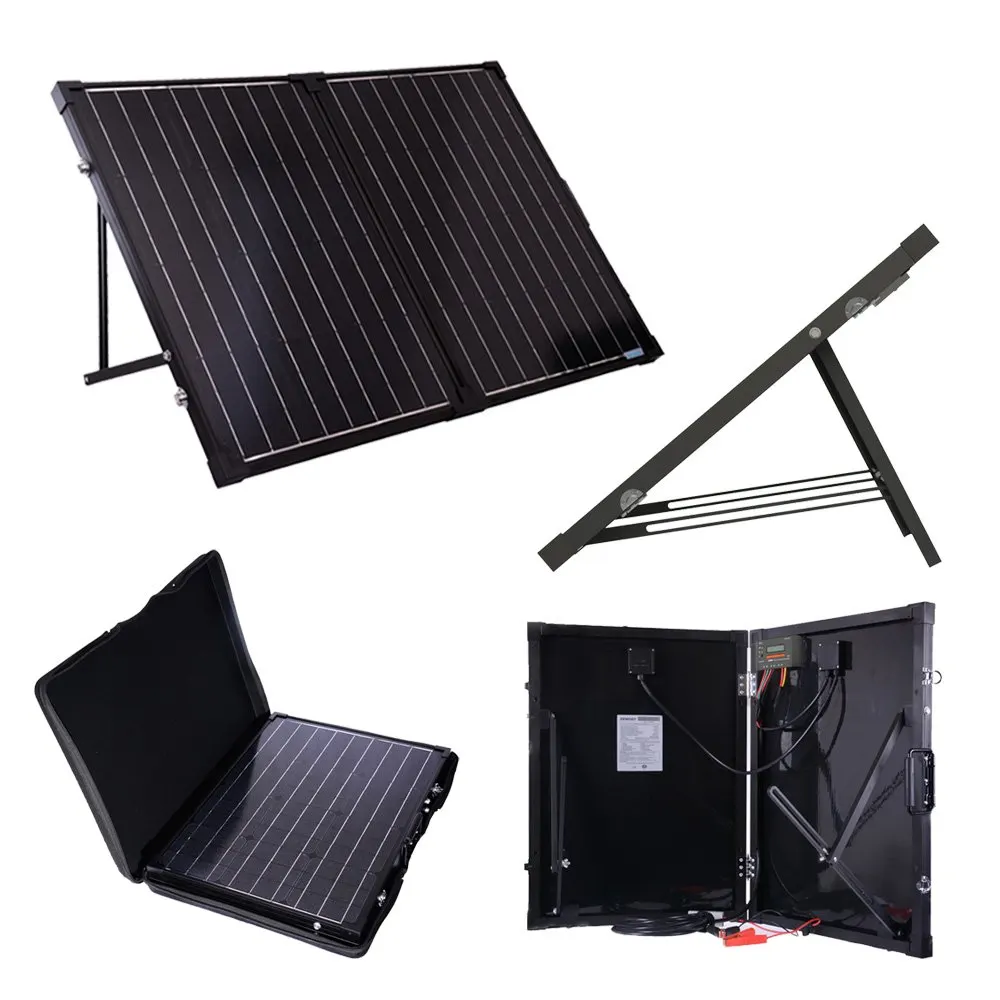
- Renogy Foldable Suitcase Solar Charger
- Yamaha 2000watt Inverter Generator
Labels:
$800 RV,
budgeting,
cabin,
camper,
cheap,
cheap camper,
conversion,
freedom,
homeless,
money,
recreational vehicle,
savings,
simplify,
tiny house,
travel,
traveler,
traveling,
vagabond,
van,
van dwelling
Subscribe to:
Posts (Atom)